
Johnson Pocket Door systems offer a space-saving‚ privacy-enhancing solution for homes. This guide provides comprehensive‚ step-by-step instructions for a smooth installation‚ covering everything from planning to finishing touches.
Overview of Johnson Pocket Door Systems
Johnson Pocket Door systems are designed for smooth‚ space-efficient operation‚ offering privacy and functionality. The 1500PF Series handles standard-duty needs‚ supporting doors up to 125 lbs‚ while the 1500HD Series is built for heavy-duty applications with all-steel construction. These systems are adaptable to various wall types‚ including 2×4 timber or steel stud walls with optional adapters. Frame kits are pre-packaged for easy transport and installation‚ catering to single or converging door setups. Johnson’s systems are known for their durability and versatility‚ making them a popular choice for residential and commercial projects. Detailed guides and videos are available to ensure proper installation and optimal performance.
Importance of Proper Installation
Proper installation of Johnson Pocket Door systems is crucial for ensuring smooth operation‚ safety‚ and longevity. Misalignment or incorrect hardware usage can lead to door sags‚ uneven movement‚ or even hardware failure. A well-installed system guarantees efficient functionality‚ preventing potential damage to the door or wall. Correct alignment of tracks and proper weight distribution are essential to handle the door’s weight‚ ensuring it glides effortlessly. Following the manufacturer’s instructions closely minimizes risks and ensures a professional finish. Proper installation also enhances safety‚ preventing accidents from door malfunctions. Attention to detail during setup is vital for a durable and trouble-free pocket door system.
Tools and Materials Needed
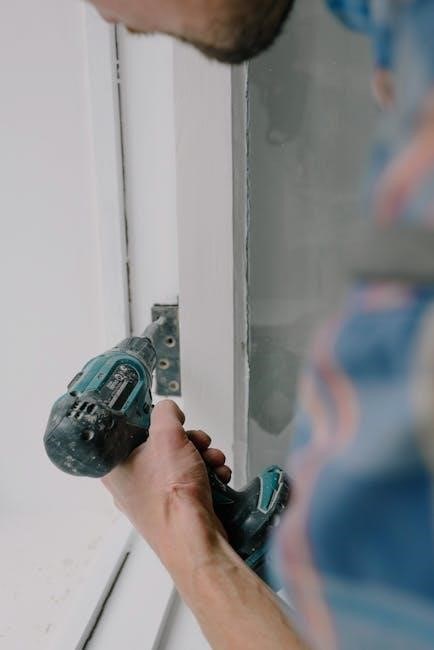
Essential tools include a level‚ drill‚ measuring tape‚ and screwdrivers. Materials required are the Johnson Pocket Door frame kit‚ track‚ hinges‚ and necessary hardware for secure installation.
Essential Tools for Installation
A level ensures proper alignment‚ while a drill and screwdrivers handle hardware assembly. A measuring tape and utility knife are crucial for accurate cuts. Additional tools include a stud finder‚ pencil‚ and wrench for securing frames. Safety gear like gloves and goggles is recommended. Proper tools ensure a precise‚ efficient installation‚ avoiding costly mistakes. Always refer to Johnson’s instructions for specific tool recommendations tailored to your kit. Having all tools ready beforehand streamlines the process‚ making installation smoother and less time-consuming.
Required Materials and Hardware
The Johnson Pocket Door system requires specific materials for installation. The frame kit includes a header‚ track‚ hangers‚ and split studs. Additional hardware like door stops‚ hinges‚ and handles must be purchased separately. Ensure you have drywall screws‚ wood shims‚ and a stud finder for proper framing. For steel studs‚ the 1574PLBG adapter kit is necessary. Verify all components are included in your kit before starting. Refer to the 1500 Series manual for a detailed list of required materials. Having all hardware ready ensures a seamless installation process and prevents delays.

Preparation and Planning
Measure the door and wall opening accurately‚ ensuring proper alignment. Check wall construction and framing to confirm it meets the kit’s requirements for a secure installation.
Measuring the Door and Wall Opening
Accurate measurements are crucial for a successful installation. Measure the door’s width and height‚ ensuring it fits the wall opening. Use the product itself to locate mounting points precisely. For doors shorter than 80 inches‚ lower the header and cut the split studs. If the door is taller‚ order longer split studs and raise the header. Double-check all dimensions to ensure proper alignment and fit. Consult the manual for specific adjustments based on your door size and wall type. Precise measurements prevent installation issues and ensure smooth operation. Always verify before cutting or drilling to avoid errors.
Checking Wall Construction and Framing
Before installation‚ inspect the wall to confirm it suits the Johnson Pocket Door system. Ensure the wall is constructed with 2×4 timber or 4 steel studs‚ as specified for the 1500PF Series. For steel studs‚ use the 1574PLBG 4 Steel Stud Adapter Kit. Verify the wall is not load-bearing unless reinforced. Check for any obstructions like wiring or plumbing in the wall cavity; Proper framing alignment is essential for smooth door operation. If the wall framing is uneven or damaged‚ address these issues before proceeding. Incorrect wall construction can lead to installation problems or structural instability.

Understanding Johnson Pocket Door Series
Johnson offers the 1500PF Standard-Duty and 1500HD Heavy-Duty pocket door frames‚ designed for 2×4 timber or 4 steel stud walls with the 1574PLBG adapter for steel studs.
1500PF Series Standard-Duty Pocket Door Frame
The 1500PF Series is a versatile‚ standard-duty pocket door frame designed for 2×4 timber or 4 steel stud walls with the 1574PLBG Steel Stud Adapter Kit. It supports doors up to 125 lbs‚ ideal for single or converging door applications. The frame is pre-packaged for easy transport and quick installation‚ with components marked for cutting to shorter lengths if needed. It’s suitable for standard door sizes‚ with adjustable features to accommodate various wall constructions‚ ensuring a smooth and efficient installation process for homeowners and contractors alike.
1500HD Series Heavy-Duty Pocket Door Frame
The 1500HD Series is a heavy-duty‚ commercial-grade pocket door frame designed for larger‚ heavier doors in high-traffic areas. Featuring all-steel split studs‚ it provides exceptional strength and durability. This frame is ideal for doors exceeding standard sizes and weights‚ ensuring smooth operation and long-lasting performance. It is compatible with 2×4 timber or steel stud walls and includes self-tapping drywall and trim screws for easy installation. The 1500HD Series is perfect for residential and commercial applications‚ offering a robust solution for privacy and space efficiency in demanding environments.
Installation Process
The Johnson Pocket Door installation involves a step-by-step process‚ ensuring proper hardware alignment and smooth door operation for a seamless and functional result.
Step-by-Step Framing and Assembly
Begin by measuring the wall opening to ensure compatibility with the Johnson Pocket Door frame. Assemble the frame according to the manufacturer’s instructions‚ starting with the header and split studs. For the 1500PF Series‚ attach the split studs to the header‚ ensuring proper alignment. Secure the frame to the wall studs using the provided screws. If using the 1500HD Series‚ follow the same steps but note the all-steel construction for added durability. Ensure the frame is level and plumb before proceeding. Proper assembly is critical for smooth door operation and long-term stability.
Hanging the Door and Adjusting Hardware
Attach the door to the Johnson Pocket Door frame using the provided hinges‚ ensuring proper alignment. Secure the door to the frame with screws‚ following the manufacturer’s torque specifications. Next‚ install the track and rollers‚ making sure they are level and evenly spaced. Once the door is hung‚ test its movement by sliding it back and forth. Adjust the rollers or hinges as needed to ensure smooth operation. Finally‚ attach the door handle and locking mechanism‚ aligning them with the strike plate for proper functionality. Proper hardware adjustment is essential for seamless door performance;
Installing Handles and Locking Mechanisms
Once the door is hung‚ install the handles and locking mechanisms. Mark the door and wall for handle placement‚ ensuring alignment with the strike plate. Drill pilot holes and secure the handle using screws. For locking mechanisms‚ attach the lock to the door edge and align it with the strike plate on the frame. Test the lock to ensure smooth operation. Proper installation ensures secure and functional door closure. Follow manufacturer instructions for specific hardware requirements and adjustments. This step finalizes the door’s usability and security‚ completing the installation process effectively.

Finishing Touches
Trim excess materials‚ paint the frame to match the wall‚ and ensure smooth door operation. Final inspections confirm proper alignment and functionality‚ completing the installation seamlessly.
Trimming and Painting the Frame
After assembling the frame‚ trim any excess materials to ensure a precise fit. Sand the surfaces for a smooth finish and paint the frame to match the surrounding wall color. Allow the paint to dry completely before proceeding. This step ensures the pocket door frame blends seamlessly with the room’s design. Proper trimming and painting are essential for a professional-looking installation. Once done‚ install the door handles and test the door’s operation to confirm smooth movement. These final touches complete the installation process‚ providing both functionality and aesthetic appeal.

Ensuring Smooth Door Operation
Proper alignment and adjustment are crucial for smooth door operation. After installation‚ check the door’s movement by sliding it back and forth. Lubricate all moving parts‚ such as hinges and rollers‚ to reduce friction. Ensure the track is securely fastened and free from obstructions. If the door sags or misaligns‚ adjust the hardware according to the manufacturer’s instructions. Test the door’s operation repeatedly to confirm smooth gliding. Addressing any issues promptly prevents wear and tear‚ ensuring long-term functionality and ease of use. Regular maintenance will keep your Johnson pocket door operating seamlessly for years.
Troubleshooting Common Issues
Address misalignment by adjusting hardware and ensuring proper installation. Fix sagging doors by tightening brackets. Lubricate moving parts and check for obstructions to ensure smooth operation.
Addressing Misalignment and Sags
Misalignment and sags are common issues that can affect the functionality of your Johnson pocket door. To address these problems‚ start by inspecting the track and hinges for proper alignment. If the door sags‚ check the split studs and ensure they are securely fastened. Adjust the hinges by loosening the screws and repositioning them slightly. For misalignment‚ verify that the door is level and the track is straight. Tightening any loose brackets or realigning the track can resolve these issues. Regular maintenance and inspections help prevent such problems from arising.
Fixing Hardware Malfunctions
Hardware malfunctions‚ such as hinges coming loose or rollers wearing out‚ can disrupt your pocket door’s smooth operation. Start by inspecting the hinges and rollers for damage or misalignment. Tighten any loose screws on the hinges and replace worn-out rollers with genuine Johnson Hardware parts. Lubricate moving components to ensure smooth functionality. If the door stops sliding evenly‚ check the track for debris or dents and clean or replace it as needed. Regular inspections and timely repairs can prevent further damage and extend the lifespan of your Johnson pocket door system.

Maintenance and Care
Regular maintenance ensures smooth operation of your Johnson pocket door. Lubricate hinges and rollers periodically‚ clean tracks‚ and inspect for wear. Address issues promptly to prevent damage.

Cleaning and Lubricating Moving Parts
Regular cleaning and lubrication are essential for maintaining smooth operation of your Johnson pocket door. Use a soft cloth to wipe down tracks and rollers‚ removing dust and debris. Apply a silicone-based lubricant to hinges and moving parts to reduce friction and prevent squeaking. Avoid using harsh chemicals or abrasive materials that could damage the finish or components. Lubricate every 6-12 months or as needed‚ depending on usage. Proper maintenance ensures longevity and optimal performance of your pocket door system.
Regular Inspections for Wear and Tear
Regular inspections are crucial to ensure the longevity and smooth operation of your Johnson pocket door. Check hinges‚ rollers‚ and tracks for signs of wear or misalignment. Look for loose screws‚ dented tracks‚ or worn-out rollers‚ which can cause the door to sag or stick. Inspect the door frame and surrounding walls for any structural damage or warping. Lubricate moving parts if necessary and tighten any loose hardware. Addressing issues early prevents major repairs. Schedule professional inspections every 1-2 years for optimal maintenance. Regular checks ensure your pocket door remains functional and secure for years to come.
Frequently Asked Questions
Common questions about Johnson pocket door installation include handling door size‚ wall type‚ and hardware compatibility. Solutions often involve precise measurements and proper frame alignment for smooth operation.

Common Questions About Pocket Door Installation
Homeowners often ask about door size compatibility‚ wall construction requirements‚ and hardware selection. Another frequent query is whether existing swinging doors can be converted to pocket doors. Additionally‚ questions arise about handling uneven walls and ensuring smooth door operation. Many wonder about the weight capacity of different Johnson frames‚ such as the 1500PF and 1500HD series. Others inquire about the best practices for installing soft-close mechanisms and troubleshooting common issues like misalignment. These questions highlight the need for precise planning and adherence to installation guidelines for a successful project.
Solutions to Typical Installation Problems
Common issues during installation include door misalignment‚ uneven wall framing‚ and hardware malfunctions. To address these‚ ensure the track is level and securely fastened. For misalignment‚ adjust the hinges or realign the track. If the door sags‚ check the wall studs for proper support and consider adding reinforcement. Lubricate moving parts to resolve sticking issues. For hardware failures‚ refer to Johnson’s replacement parts guide or contact customer support. Always follow the manufacturer’s instructions and use the correct tools to avoid complications. Proper planning and precise measurements are key to overcoming installation challenges effectively.
Successfully installing a Johnson Pocket Door enhances your home’s functionality and aesthetics. With proper planning and execution‚ you’ll enjoy a smooth‚ space-saving solution for years to come.
Final Tips for a Successful Installation

Ensure precise measurements and proper wall preparation to avoid misalignment. Use the correct hardware series for your door weight and wall type. Follow step-by-step instructions carefully‚ double-checking each component before moving forward. Test the door’s smooth operation after installation and adjust hardware as needed. For optimal results‚ use shims to align the frame perfectly. Consult Johnson’s guides or customer support for troubleshooting. Regular maintenance‚ like lubricating hinges‚ will extend the door’s lifespan. By adhering to these tips‚ you’ll achieve a professional-grade installation that enhances your home’s functionality and aesthetics.
Enjoying Your Newly Installed Pocket Door
After completing the installation‚ step back and admire your handiwork. A properly installed Johnson pocket door enhances your home’s functionality and style‚ providing smooth‚ quiet operation. Regularly clean and lubricate moving parts to maintain performance. Take pride in knowing you’ve added a space-saving‚ privacy-enhancing feature that elevates your home’s convenience and aesthetic appeal. With proper care‚ your pocket door will serve as a reliable and stylish solution for years to come‚ offering effortless transitions between spaces while complementing your interior design.