
Welcome! This manual provides essential guidance for operating your Hoover washing machine, ensuring optimal performance and longevity․ Access downloadable PDF user manuals online for specific models․
Understanding Your Model
Identifying your specific Hoover washing machine model is crucial for accessing the correct user manual and support resources․ Locate the model number, typically found on a sticker inside the door, on the rear panel, or within the appliance’s documentation․
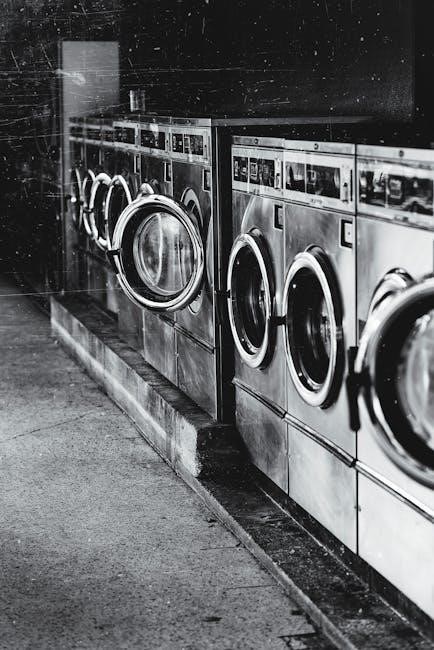
Hoover offers a diverse range of washing machines, including models like the H-WASH 500 series, Dynamic Next, and various other capacities and spin speeds․ Each model boasts unique features and program options․
Referencing the correct manual ensures you understand your machine’s capabilities, from smart settings to troubleshooting tips․ Downloadable PDFs are readily available on the official Hoover website and ManualsLib, providing detailed instructions tailored to your appliance․
Important Safety Instructions
Prioritize safety when operating your Hoover washing machine․ Always disconnect the appliance from the power supply before cleaning or performing maintenance․ Never attempt to repair the machine yourself; contact qualified service personnel for assistance․
Keep children and pets away from the washing machine during operation․ Do not overload the drum, as this can cause damage and affect performance․ Ensure the water supply and drain hoses are securely connected to prevent leaks․
Read the full instruction manual thoroughly before first use, paying close attention to all warnings and cautions․ Improper use can lead to hazards – always follow guidelines!
Getting Started
Begin your laundry experience! This section details initial setup, water connections, loading procedures, and proper detergent usage for your new Hoover washing machine․
Initial Setup and Installation
Unpacking and Positioning: Carefully unpack your Hoover washing machine, removing all transit bolts – crucially important to prevent damage during operation! These are typically located at the rear of the appliance․ Position the machine on a firm, level floor; adjust the feet to ensure stability and minimize vibration․
Space Requirements: Allow sufficient space around the machine for ventilation and access for maintenance․ Ensure the water supply and drain hose connections are easily reachable․
Electrical Connection: Connect the machine to a properly grounded electrical outlet, matching the voltage requirements specified on the appliance’s rating label․ Never use extension cords or adapters․
First Run: Before the first wash, run an empty cycle with a small amount of detergent to clean the drum and hoses․
Connecting Water Supply
Hose Connection: Attach the supplied inlet hoses to the back of the washing machine, connecting the blue hose to the cold water supply and the red hose (if applicable) to the hot water supply․ Ensure connections are tight to prevent leaks․
Water Tap: Screw the other ends of the hoses securely to the corresponding water taps․ Use new seals if necessary․ Fully open the water taps after connection․
Pressure Requirements: Your Hoover washing machine requires a specific water pressure – check your model’s specifications․ If the water pressure is too high, install a pressure reducing valve․
Leak Check: After connecting, carefully check all connections for leaks․ Run a short wash cycle to confirm a secure and leak-free water supply․
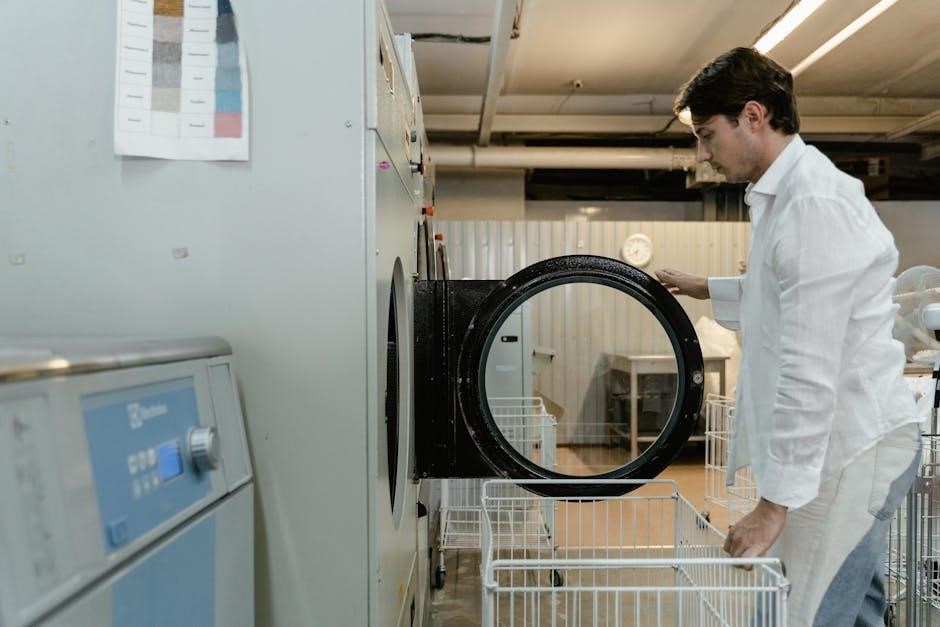
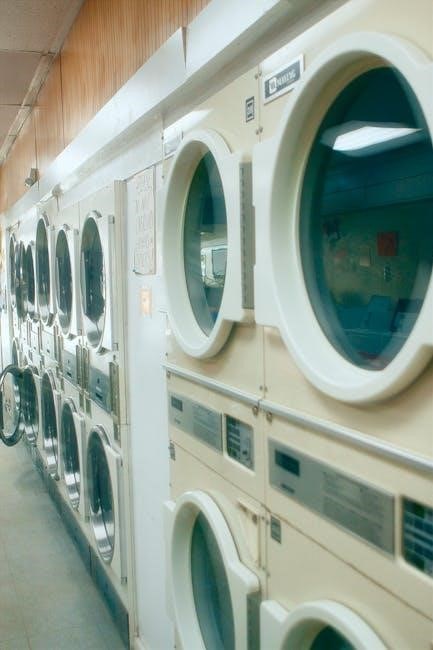
Loading Laundry
Capacity: Avoid overloading the drum․ Refer to your machine’s specifications for the maximum load capacity, typically measured in kilograms․ Overloading can reduce washing effectiveness and damage the machine․
Item Distribution: Distribute laundry items evenly inside the drum to maintain balance during the spin cycle․ Uneven loads can cause excessive vibration and noise;
Pocket Check: Always empty pockets before loading clothes․ Remove coins, keys, and other objects that could damage the machine or other items․
Delicate Items: Place delicate items, like lingerie, inside a mesh laundry bag to protect them from damage during washing․
Detergent Dispenser Guide
Compartments: Your Hoover washing machine’s detergent dispenser typically features separate compartments for pre-wash detergent, main wash detergent, and fabric softener․ Refer to the dispenser’s markings for proper placement․
Detergent Type: Use only high-efficiency (HE) detergents specifically designed for washing machines; Regular detergents can create excessive suds and reduce cleaning performance․
Dosage: Follow the detergent manufacturer’s instructions for the correct dosage based on load size and soil level․ Avoid overusing detergent, as it can leave residue on clothes․
Softener Level: Do not exceed the maximum fill line for the fabric softener compartment to prevent staining or spotting on your laundry․

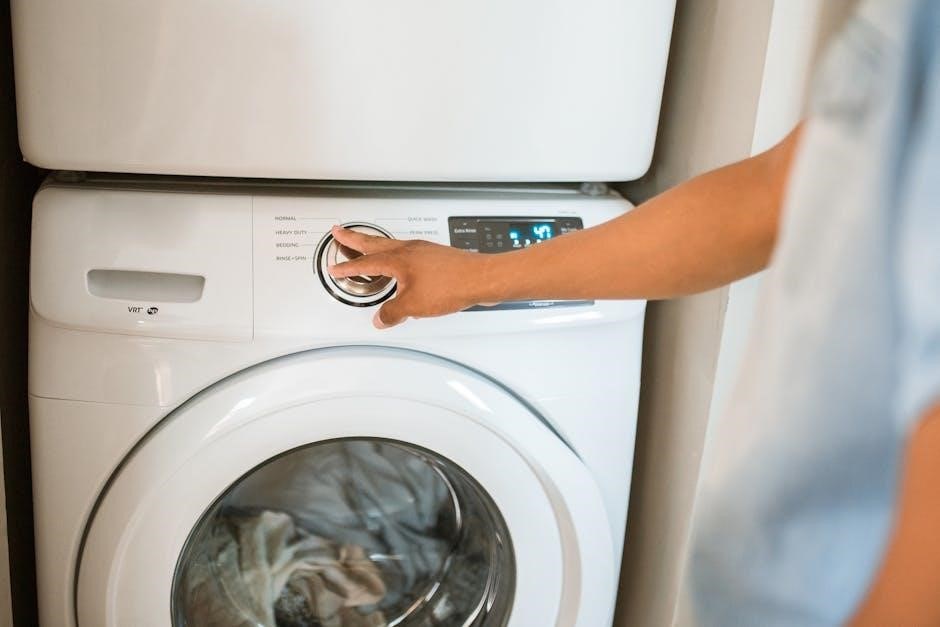
Control Panel Overview
Intuitive Design: The control panel allows easy program selection, temperature adjustments, and spin speed control for a customized washing experience․
Program Selection Dial
Navigating Wash Cycles: The program selection dial is your central control for choosing the appropriate wash cycle for your laundry․ Rotate the dial to align with the desired program – options typically include Cotton, Synthetics, Delicates/Wool, Quick Wash, and Eco․
Each program is pre-set with specific wash parameters, such as water temperature, drum rotation speed, and rinse cycles, optimized for different fabric types and soil levels․ Refer to the ‘Washing Programs’ section for detailed information on each cycle’s characteristics․ Ensure the dial is firmly positioned on your chosen program before starting the machine․ Some models may feature additional program options accessible through the dial or digital display․
Temperature Settings
Controlling Water Heat: Your Hoover washing machine allows you to adjust the water temperature for each wash cycle, catering to different fabric care needs․ Options generally include Cold Wash, 30°C, 40°C, 60°C, and 90°C․
Lower temperatures are ideal for delicate fabrics and preventing color fading, while higher temperatures are effective for sanitizing and removing stubborn stains from durable items like whites․ Always check the care label on your garments before selecting a temperature․ Some programs may have pre-set temperature limitations for optimal results․ Adjusting the temperature impacts energy consumption; colder washes save energy․
Spin Speed Options
Extracting Water Efficiently: Your Hoover washing machine offers variable spin speeds, measured in revolutions per minute (RPM), to control the amount of water remaining in your laundry․ Common options range from No Spin/Delicate to 400, 800, 1200, and 1400 RPM․
Lower spin speeds are gentler on delicate fabrics, minimizing wrinkles and damage․ Higher spin speeds extract more water, reducing drying time but potentially causing more creasing․ Selecting the appropriate spin speed depends on the fabric type and desired outcome․ Consider using a lower spin speed for items you plan to air dry․
Display Indicators and Symbols
Decoding the Panel: The display panel utilizes various indicators and symbols to communicate the machine’s status and selected settings․ Common symbols include a wash tub (cycle progress), a temperature icon (water temperature), and a spin speed indicator (RPM)․
Error codes, displayed as alphanumeric combinations, signal specific issues requiring attention – consult the troubleshooting section for explanations․ A padlock symbol indicates a child lock is active, preventing accidental program changes․ A delay start indicator shows remaining time before the cycle begins․ Familiarizing yourself with these symbols ensures efficient operation and quick problem identification․

Washing Programs
Program Variety: Your Hoover machine offers diverse programs – Cotton, Synthetics, Delicates, Quick Wash, and Eco – tailored for different fabric types and cleaning needs․
Cotton Program Details
Optimal for everyday cottons and linens, the Cotton program delivers powerful cleaning performance․ This program utilizes higher wash temperatures and vigorous agitation to effectively remove dirt and stains from robust fabrics․ Several sub-options may be available, including pre-wash for heavily soiled items and an intensity setting to adjust the wash cycle’s strength․
Temperature control allows selection from cold to 90°C, while spin speed can be adjusted to suit the fabric’s weight and desired dryness level․ Always check garment care labels before selecting this program․ For best results, avoid overloading the drum, ensuring clothes have sufficient space to move freely during the wash cycle․ This ensures thorough cleaning and minimizes creasing․
Synthetic Program Details
Designed for synthetic fabrics like polyester and nylon, the Synthetic program offers a gentler wash compared to the Cotton cycle․ It utilizes moderate temperatures and reduced agitation to protect fibers and prevent damage․ This program is ideal for items requiring regular cleaning without harsh treatment, maintaining color vibrancy and shape․
Adjustable settings allow customization based on fabric type and soil level․ Lower temperatures are recommended for delicate synthetics, while higher temperatures can be used for more durable items․ Spin speed can also be adjusted to minimize creasing and prevent stretching․ Always consult garment care labels for specific washing instructions before use․
Delicate/Wool Program Details
The Delicate/Wool program is specifically engineered for sensitive fabrics like silk, lace, and wool, requiring utmost care during washing․ It employs a very gentle wash action with cool temperatures and minimal agitation to prevent shrinking, stretching, or damage to delicate fibers; This cycle preserves the natural softness and shape of these materials․
Utilizing a low spin speed further protects delicate items․ It’s crucial to use a detergent specifically formulated for wool or delicates to maintain fabric integrity․ Always check garment care labels; hand-wash only items should not be machine washed, even on this gentle cycle․ Proper care ensures longevity and beauty․
Quick Wash Program Details
The Quick Wash program is ideal for lightly soiled laundry requiring a fast refresh․ This cycle significantly reduces wash time – typically completing in 15-30 minutes – making it perfect for busy schedules or small loads․ It utilizes moderate temperatures and a streamlined wash sequence to efficiently clean items without excessive water or energy consumption․
While convenient, remember this program is best suited for items that aren’t heavily stained․ Overloading can compromise cleaning performance․ Use a suitable detergent for optimal results․ This program offers a practical solution for quickly laundering everyday clothes, providing a balance between speed and cleanliness․
Eco Program Details
The Eco program is designed for energy-efficient washing, minimizing both water and electricity usage while still delivering effective cleaning results․ This cycle typically operates at lower temperatures – often 20°C or 40°C – and utilizes a reduced water level․ It’s ideal for normally soiled laundry and contributes to a more sustainable lifestyle․
Although the Eco program has a longer wash duration compared to quicker cycles, the energy savings are substantial․ Using the appropriate amount of detergent is crucial for optimal performance․ This program aligns with environmental responsibility, offering a balance between cleaning power and resource conservation, making it a smart choice for everyday washing․
Special Features
Explore advanced functionalities! Your Hoover machine may include Delay Start, Pre-Wash, Extra Rinse, and even Steam functions for customized, efficient laundry care․
Delay Start Function
Convenient Scheduling: The Delay Start function allows you to conveniently schedule your washing cycle to begin at a later time․ This is incredibly useful for taking advantage of off-peak energy rates, or simply having freshly washed laundry ready when you need it․
How to Use: Typically, you’ll select the desired program, temperature, and spin speed, then use the Delay Start button to set the delay duration – often in hours․ The display will indicate the estimated end time of the cycle․ Remember to ensure the water supply is connected and detergent is loaded before activating the delay․ This feature provides flexibility and optimizes your laundry routine, fitting seamlessly into your busy lifestyle․ Always refer to your specific model’s manual for precise instructions․
Pre-Wash Option
For Heavily Soiled Items: The Pre-Wash option is designed for garments with significant dirt or staining, offering an extra cleaning cycle before the main wash begins․ This is particularly beneficial for work clothes, children’s wear, or items that have been stored for a long period․
How it Works: Activating the Pre-Wash adds a shorter, cooler wash cycle at the beginning of the selected program․ It’s recommended to use a small amount of detergent specifically for the pre-wash stage․ This loosens stubborn dirt, preventing it from setting during the main wash, and ultimately improving cleaning performance․ Check your machine’s manual to confirm the appropriate detergent quantity and program compatibility for optimal results․
Extra Rinse Option
For Sensitive Skin & Thorough Cleaning: The Extra Rinse option adds one or more rinse cycles to your selected wash program․ This is highly recommended for individuals with sensitive skin, allergies, or those who want to ensure all detergent residue is removed from their clothes․
Benefits & Usage: Utilizing an extra rinse minimizes the risk of skin irritation caused by leftover detergent․ It’s also useful when washing baby clothes or items intended for prolonged contact with skin․ To activate, simply select the ‘Extra Rinse’ function on your Hoover washing machine’s control panel before starting the wash cycle․ This ensures a more thorough and gentle cleaning process․
Steam Function (if applicable)
Harnessing the Power of Steam: If your Hoover washing machine model includes a steam function, it offers enhanced cleaning and hygiene benefits․ Steam penetrates fabrics more effectively than water alone, loosening dirt and reducing wrinkles․
Benefits & Usage: This feature is ideal for refreshing clothes, sanitizing items, and reducing the need for ironing․ Select the appropriate steam program on the control panel – options may include ‘Steam Refresh’ or ‘Steam Hygiene’․ The steam function can also help to eliminate odors and allergens, providing a deeper clean․ Always check garment care labels before using steam to ensure fabric compatibility․

Maintenance and Cleaning
Regular upkeep ensures your Hoover washing machine operates efficiently․ Clean the detergent dispenser, drum, filter, and descale periodically for optimal performance․
Cleaning the Detergent Dispenser
Maintaining a clean detergent dispenser is crucial for preventing blockages and ensuring optimal washing performance․ Regularly remove the dispenser drawer – typically by pressing a release button or lever – and rinse it thoroughly under warm running water․ Stubborn detergent residue can be loosened with a soft brush or cloth․
Pay close attention to the compartments for pre-wash detergent, main wash detergent, and fabric softener, as these areas are prone to buildup․ Inspect the dispenser housing within the machine and remove any lingering debris․ Ensure the dispenser is completely dry before reinserting it into the washing machine․ A clean dispenser guarantees accurate detergent distribution and prevents potential issues with your laundry cycles․
Cleaning the Drum
Regular drum cleaning keeps your Hoover washing machine fresh and hygienic, preventing mildew and odor buildup․ Run an empty hot wash cycle with a washing machine cleaner, following the product’s instructions carefully․ Alternatively, use a cup of white vinegar added directly to the drum․
For visible residue, wipe down the drum’s interior with a damp cloth after each wash․ Pay attention to the rubber gasket around the door, as this area can trap lint and debris․ Avoid using abrasive cleaners, as they may damage the drum’s surface․ A clean drum ensures your clothes are washed in a pristine environment․
Cleaning the Filter
Regular filter cleaning is crucial for maintaining your Hoover washing machine’s performance and preventing drainage issues․ Locate the filter access panel, typically at the front bottom of the machine․ Have a towel ready to catch any residual water before opening the panel․
Carefully remove the filter and rinse it thoroughly under running water, removing lint, hair, and small objects․ Inspect the filter housing for any obstructions; Reinstall the filter securely, ensuring it’s properly aligned․ A clogged filter can cause slow draining or even machine malfunction, so cleaning it regularly is essential․
Descaling the Machine
Over time, limescale can build up inside your Hoover washing machine, reducing its efficiency and lifespan․ Descaling is recommended if you live in a hard water area or notice reduced heating performance․ Use a commercially available descaler specifically designed for washing machines, following the product instructions carefully․
Typically, this involves adding the descaler to the detergent dispenser and running an empty hot wash cycle․ Ensure the machine is thoroughly rinsed afterward by running an additional rinse cycle․ Regular descaling helps maintain optimal performance and prevents costly repairs․
Troubleshooting Common Issues
Facing problems? This section offers solutions for typical issues like the machine not starting, water draining problems, and deciphering error codes;
Machine Not Starting
Problem: Your Hoover washing machine fails to power on or respond when the start button is pressed․ First, verify the power supply – ensure the machine is correctly plugged into a functioning socket and the fuse hasn’t blown․
Check the door: The machine won’t start if the door isn’t securely closed․ Confirm it latches properly․ Inspect the control panel for any locked or inactive settings․
Water supply: A lack of water pressure can sometimes prevent startup․ Ensure the water taps are fully open․ If the issue persists, consult the error code section of this manual, as a specific code might indicate the problem․ Finally, if none of these steps resolve the issue, contact customer support․
Water Not Draining
Problem: Water remains in the drum after a wash cycle, preventing you from removing laundry․ Initially, check the drain hose for any kinks or obstructions․ Ensure it isn’t bent or crushed, restricting water flow․
Inspect the drain filter: This is a common cause․ Locate and carefully clean the filter (refer to the ‘Maintenance and Cleaning’ section)․ Verify the drain pipe isn’t clogged․
Error codes: Consult the error code section of this manual; a specific code may pinpoint the issue․ If the problem continues, a pump malfunction might be the cause, requiring professional assistance․ Do not attempt to disassemble the pump yourself․
Error Codes and Meanings
Error codes indicate specific issues with your Hoover washing machine․ “F01” often signals a water inlet problem – check the water supply and hose․ “F02” typically means a drainage issue; inspect the drain hose and filter․
“F03” can indicate an imbalance during the spin cycle; redistribute the laundry․ “F04” suggests a temperature sensor fault, requiring professional attention․ “F10” often relates to a door locking malfunction․
Refer to the full error code list in this manual for a comprehensive explanation of each code and potential solutions․ If an error persists after troubleshooting, contact Hoover customer support for assistance․ Do not ignore error codes!
Technical Specifications
Dimensions and weight vary by model․ Check your specific Hoover washing machine’s details for precise measurements and energy efficiency ratings listed within․
Dimensions and Weight
Understanding the physical specifications of your Hoover washing machine is crucial for proper installation and space planning․ Dimensions, including height, width, and depth, differ significantly between models – from compact 60cm wide machines to larger 85cm options․
Weight also varies considerably, ranging from approximately 60kg to over 75kg depending on the capacity and features․ Always consult the specific model’s documentation, readily available as a downloadable PDF user manual, for accurate measurements․
These details are vital when navigating tight spaces or planning for delivery and placement․ Incorrect assumptions about size or weight can lead to installation difficulties․ Referencing the official specifications ensures a smooth and trouble-free setup process;
Energy Efficiency Rating
Hoover washing machines are designed with energy conservation in mind, reflected in their energy efficiency ratings․ These ratings, typically displayed on a scale from A to G (with A being the most efficient), indicate the machine’s energy consumption during operation․
Modern Hoover models frequently achieve high ratings, minimizing environmental impact and reducing your utility bills․ Detailed energy consumption data, including kilowatt-hours (kWh) per wash cycle, is available in the downloadable PDF user manual for each specific model․
Understanding the energy efficiency rating allows you to make informed choices and select a machine that aligns with your sustainability goals․ Always check the energy label before purchasing․

Warranty Information
Your Hoover washing machine is covered by a manufacturer’s warranty, protecting against defects in materials and workmanship․ The standard warranty period typically lasts for one year from the date of purchase, though extended warranty options may be available․
The warranty covers repairs or replacement of faulty parts, subject to terms and conditions outlined in the full warranty document․ It’s crucial to register your appliance promptly after purchase to activate the warranty․
Detailed warranty information, including claim procedures and exclusions, can be found within the downloadable PDF user manual specific to your model․ Keep your proof of purchase safe for warranty claims․