Welcome to our guide on Grohe kitchen faucet repair! Grohe faucets are renowned for their durability, but regular maintenance is essential to ensure optimal performance and longevity.
By understanding the benefits of DIY repair and following proper techniques, you can address common issues and keep your faucet functioning like new, saving time and money.
1.1. Importance of Regular Maintenance
Regular maintenance is crucial for extending the lifespan of your Grohe kitchen faucet and ensuring its optimal performance. By addressing wear and tear early, you can prevent minor issues from escalating into costly repairs.
Simple tasks like cleaning the aerator, inspecting O-rings, and checking for leaks can significantly reduce the likelihood of major breakdowns. Consistent upkeep also ensures water efficiency and proper flow, aligning with Grohe’s commitment to quality and functionality.
Investing time in routine care not only saves money but also maintains the faucet’s aesthetic appeal, making it a worthwhile effort for any homeowner.
1.2. Benefits of DIY Repair
Tackling Grohe kitchen faucet repairs yourself offers numerous benefits, including significant cost savings and the empowerment of resolving issues independently. DIY repair allows homeowners to address problems promptly, avoiding the inconvenience of waiting for professional assistance;
With Grohe’s comprehensive repair manuals and accessible spare parts, individuals can confidently handle repairs, gaining a deeper understanding of their faucet’s mechanics. This hands-on approach not only enhances troubleshooting skills but also fosters a sense of accomplishment and self-sufficiency.
Moreover, DIY repair encourages regular maintenance, potentially preventing future issues and extending the faucet’s lifespan. It’s a practical and rewarding way to maintain your kitchen’s functionality and aesthetic appeal.
1.3. Overview of Grohe Faucet Design
Grohe kitchen faucets are renowned for their sleek, durable, and innovative design, combining functionality with modern aesthetics. Their construction typically features high-quality materials, such as 316 stainless steel, ensuring long-lasting performance.
The design incorporates advanced technologies like the Eurodisc cartridge, which provides smooth handle operation and precise temperature control. Additionally, Grohe’s CoolTouch technology ensures the faucet body remains cool to the touch, even when hot water is running.
Their pull-down and pull-out spray heads are designed for versatility, offering multiple spray modes for various tasks. The overall design focuses on user convenience, durability, and style, making Grohe faucets a popular choice for modern kitchens.
Understanding the Grohe Kitchen Faucet Manual
The Grohe kitchen faucet manual is an essential guide for troubleshooting, maintenance, and repairs. It provides detailed instructions, safety tips, and parts information to ensure proper functionality.
2.1. How to Access Official Grohe Repair Manuals
To access official Grohe repair manuals, visit the Grohe website and navigate to the “Technical Downloads” section. Here, you can search for your specific faucet model and download the corresponding manual. Additionally, Grohe offers a spare parts finder tool, which helps identify and locate replacement components. For further convenience, retailers like Target provide access to Grohe repair manuals and parts. Always refer to the official manual for accurate instructions tailored to your faucet model, ensuring safe and effective repairs while maintaining warranty compliance. This resource is invaluable for both DIY enthusiasts and professionals alike, offering step-by-step guidance and troubleshooting tips.
2.2. Key Sections of the Manual
The Grohe repair manual is structured to provide clear guidance, with key sections including installation instructions, troubleshooting guides, and maintenance tips. The manual begins with a parts diagram, helping users identify components and understand their function. A dedicated troubleshooting section outlines common issues and their solutions, while step-by-step repair instructions offer detailed guidance for DIY fixes. Additionally, the manual covers warranty information, safety precautions, and care instructions to maintain your faucet’s longevity. These sections ensure you have all the necessary information to address repairs confidently, whether you’re resolving a leak or replacing a worn-out part. By following the manual, you can ensure repairs are done safely and effectively, preserving your faucet’s performance and aesthetic appeal.
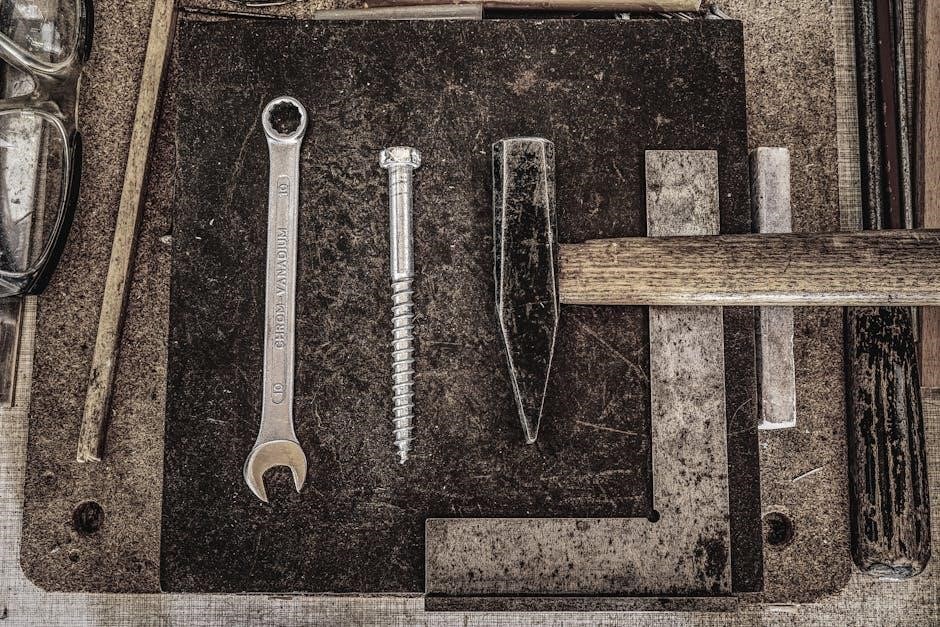
2.3. Tools and Materials Required
Before starting your repair, gather essential tools and materials to ensure a smooth process. Common tools include an adjustable wrench, screwdrivers (both flathead and Phillips), pliers, and a bucket to catch water. Materials may involve replacement parts like O-rings, gaskets, or cartridges, depending on the issue. For more complex repairs, a faucet rebuild kit might be necessary. Always refer to the manual for specific part numbers. Ensure you have a clean workspace and a towel to protect surfaces from water damage. Having the correct tools and materials on hand will save time and prevent frustration during the repair process. Proper preparation is key to a successful DIY fix.
Common Issues and Repair Solutions
Grohe kitchen faucets may face issues like leaks, dripping, or low water pressure. Identifying these problems early and addressing them with proper techniques ensures long-term functionality and efficiency.
3.1. Identifying Leaks in the Faucet
Leaks are among the most common issues in Grohe kitchen faucets. They often occur around the spout, handle, or base. To identify a leak, start by visually inspecting the faucet for water droplets or puddles. Turn on the water and check for drips from the spout or handle. Pay attention to unusual sounds, like hissing or dripping noises, which can indicate internal issues. Additionally, place a dry cloth under the faucet and run water to see if it gets wet. Regularly inspecting O-rings, gaskets, and connections can help catch leaks early. Addressing these issues promptly prevents water damage and maintains the faucet’s efficiency.
3.2. Fixing Dripping or Running Water
Dripping or running water is a common issue that can waste water and increase utility bills. Typically, this problem stems from worn-out O-rings, gaskets, or cartridges. To fix it, start by turning off the water supply and disassembling the faucet. Inspect the parts for mineral buildup or damage. Replace any faulty components with genuine Grohe parts to ensure proper sealing and function. After reassembling, check for leaks by running water through the faucet. Regular maintenance, such as cleaning and lubricating moving parts, can prevent future drips. Addressing this issue promptly not only saves water but also extends the lifespan of your Grohe faucet.
3.3. Addressing Low Water Pressure
Low water pressure in your Grohe kitchen faucet can often be resolved by addressing potential obstructions or mineral buildup. Start by checking the aerator or filter, which may be clogged with debris or mineral deposits. Clean or replace these components as needed to restore proper water flow. Additionally, inspect the spray head for any blockages and ensure it is free from dirt or mineral buildup. If low pressure persists, consider consulting the Grohe repair manual for specific guidance on adjusting flow restrictors or internal settings. Regular maintenance, such as descaling and cleaning, can help prevent future issues and maintain optimal water pressure.
Step-by-Step Repair Process
Start by turning off the water supply and disassembling the faucet to access internal components. Replace worn-out parts, such as cartridges or seals, following the Grohe manual instructions.
4.1. Turning Off Water Supply
Before starting any repair, locate the water supply lines under the sink and turn off the cold and hot water valves. Open the faucet to drain excess water from the pipes. This ensures a dry working environment and prevents water damage. Always double-check that the water supply is completely shut off to avoid any leaks or spills during the repair process. Properly securing the water supply is the first critical step in any Grohe faucet repair to ensure safety and efficiency.
4.2. Disassembling the Faucet
Disassembling your Grohe kitchen faucet requires careful attention to detail. Start by removing the handle or button, typically held by a screw or clip. Use an Allen wrench to loosen any retaining nuts or bolts. Gently pry off the escutcheon or decorative cap to access the internal mechanisms. Next, remove the cartridge or valve assembly, taking note of its orientation for reinstallation. If applicable, detach the spray head or other components. Keep all parts organized to ensure proper reassembly. Refer to your Grohe repair manual for specific diagrams or instructions, as models may vary slightly. Proper disassembly is crucial for identifying and addressing the root cause of the issue.
4.3. Replacing Worn-Out Parts
Replacing worn-out parts is a critical step in Grohe kitchen faucet repair. Begin by inspecting the faucet for damaged or corroded components, such as O-rings, gaskets, or the cartridge. Use the Grohe repair manual to identify the exact parts needed and order replacements from authorized suppliers. Once you have the new parts, carefully install them by reversing the disassembly process. Ensure all connections are secure and properly aligned. After replacing the parts, turn the water supply back on and test the faucet to confirm the issue is resolved. Proper installation ensures longevity and prevents future leaks or malfunctions. Always refer to the manual for specific instructions tailored to your faucet model.

Replacing Key Components
Grohe kitchen faucets may require replacing cartridges, spray heads, or aerators. Always use genuine Grohe parts for optimal performance and longevity. Follow manual instructions carefully.
5.1. Grohe Cartridge Replacement
Replacing the cartridge in your Grohe kitchen faucet is a common repair that can resolve issues like leaks or temperature control problems. Start by turning off the water supply and disassembling the faucet to access the cartridge. Remove the old cartridge and inspect the housing for mineral buildup or debris, cleaning it if necessary. Install the new cartridge, ensuring it is aligned properly and seated securely. Reassemble the faucet and turn the water supply back on. Test the faucet by running both hot and cold water to ensure proper function. Always use genuine Grohe replacement parts for optimal performance and longevity.
5.2. Installing a New Spray Head
Installing a new spray head on your Grohe kitchen faucet can enhance functionality and improve water flow. Start by turning off the water supply and detaching the old spray head from the faucet. Clean any mineral buildup or debris from the connection area. Take the new spray head and align it with the faucet’s mounting system, ensuring it fits securely. Tighten the connection gently to avoid damaging the threads. Once installed, turn the water supply back on and test the spray head by running water through it. Ensure proper alignment and check for leaks around the connection. This simple replacement can restore your faucet’s performance and modernize its appearance.
5.3. Replacing the Filter or Aerator
Replacing the filter or aerator in your Grohe kitchen faucet is a straightforward process that improves water flow and reduces mineral buildup. Start by turning off the water supply and disassembling the faucet’s end to access the aerator. Remove the old filter or aerator and inspect for debris or scaling. Clean the area thoroughly before installing the new part, ensuring it is securely fitted. Reassemble the faucet and turn the water supply back on. Check for leaks and test the water flow. Regular replacement of these components prevents clogging and maintains optimal performance, ensuring your faucet continues to function efficiently and effectively.

Troubleshooting Common Problems
Troubleshooting your Grohe faucet involves identifying and diagnosing issues like leaks, noise, and temperature control problems. Refer to the manual for step-by-step solutions to ensure proper repair techniques.
6.1. Diagnosing Faucet Noise
Faucet noise can be due to loose parts, worn-out components, or mineral buildup. Start by consulting the Grohe manual for guidance on identifying the source of the noise.
Listen carefully to determine if the sound is coming from the handle, cartridge, or aerator. Check for loose connections or worn-out seals, which can cause dripping or vibrating noises.
Inspect the faucet’s internal parts for mineral buildup, especially in areas like the aerator or spray head. Clean or replace these components as needed to eliminate the noise.
Refer to troubleshooting sections in the manual for specific instructions on addressing noise-related issues effectively.
6.2. Resolving Temperature Control Issues
Temperature control issues in Grohe faucets often stem from a faulty cartridge, misaligned handles, or mineral buildup in the mixing chamber. Consult the manual to locate these components and assess their condition.
Check the scald guard for proper alignment and ensure the water supply lines are connected correctly. If the issue persists, inspect the temperature control cartridge for wear or mineral deposits and replace it if necessary.
For persistent problems, refer to the Grohe repair manual for detailed instructions on recalibrating the temperature control system. If unsure, contacting a professional plumber is recommended to avoid further complications.
6.3. Fixing a Stuck Handle or Button
A stuck handle or button on your Grohe faucet can be caused by mineral buildup, worn-out parts, or improper installation. Start by turning off the water supply to avoid leaks.
Gently disassemble the handle or button mechanism, taking care not to damage surrounding components. Clean any visible mineral deposits using vinegar or a descaling solution. If parts are worn, replace them with genuine Grohe spare parts.
Lubricate moving parts with silicone-based grease to ensure smooth operation. Reassemble the faucet carefully, following the manual’s instructions. If the issue persists, consult a professional plumber to avoid further damage.

Cleaning and Maintenance Tips
Regular cleaning and maintenance are crucial for optimal performance. Daily wipe-downs and periodic descaling help prevent mineral buildup and keep your faucet functioning smoothly and looking new.
7.1. Cleaning the Faucet Head
Cleaning the faucet head is essential for maintaining water flow and appearance. Start by turning off the water supply to prevent leaks. Remove the spray head by pressing the release button or lever, then soak it in a mixture of vinegar and water to dissolve mineral deposits. Use a soft cloth or brush to gently scrub away any buildup. Rinse thoroughly and dry with a clean towel to prevent water spots. Regular cleaning prevents scaling and ensures optimal performance. For tough stains, let the head soak longer before scrubbing. This process keeps your Grohe faucet head functioning smoothly and looking like new.
7.2. Descale and Remove Mineral Buildup
Descaling your Grohe kitchen faucet is crucial to remove mineral buildup that can affect water flow and performance. Start by soaking the faucet head or filter in a mixture of vinegar and water for 30 minutes to an hour. This helps dissolve calcium and lime deposits. Use a soft cloth or toothbrush to gently scrub away loosened mineral residue. Rinse thoroughly with warm water to ensure all debris is removed. For stubborn buildup, repeat the process or soak for a longer duration. Regular descaling prevents clogs and maintains optimal water pressure. Dry the faucet with a clean towel to prevent water spots and ensure a polished finish.
7.3. Lubricating Moving Parts
Lubricating the moving parts of your Grohe kitchen faucet is essential to ensure smooth operation and prevent wear and tear. Use a silicone-based grease, as it is safe for plumbing and resistant to water. Apply a small amount to O-rings, gaskets, and any moving components, such as the handle or cartridge. Regular lubrication helps reduce friction, preventing leaks and extending the lifespan of the faucet. After applying, test the faucet to ensure all parts move freely and function correctly. Avoid using petroleum-based products, as they can degrade rubber and plastic components. Proper lubrication maintains your faucet’s performance and keeps it running like new for years to come.
Cost Factors in Grohe Faucet Repair
Grohe faucet repair costs vary based on replacement parts and labor. DIY repairs save money, while professional services may incur higher fees, depending on complexity.
8.1. Estimated Cost of Replacement Parts
The cost of replacement parts for Grohe kitchen faucets varies depending on the component. Cartridges, for instance, can range from $50 to $200, while spray heads may cost between $30 and $100. Filters or aerators are typically more affordable, priced around $20 to $50. O-rings and gaskets are the most budget-friendly, usually under $10. Prices may vary based on the specific model and where you purchase the parts. Using Grohe’s official spare parts finder ensures compatibility and accuracy. DIY repairs can save on labor costs, making it a cost-effective solution for homeowners. Always compare prices and consider warranty options when purchasing replacement parts.
8.2. DIY vs. Professional Repair Costs
DIY repairs for Grohe kitchen faucets can significantly reduce costs compared to hiring a professional. Replacement parts typically range from $20 to $200, depending on the component, while labor costs for professionals often start at $100 and can escalate depending on the complexity of the issue. For minor fixes, such as replacing a cartridge or aerator, DIY is cost-effective and straightforward. However, for more complex problems, professional assistance may be necessary, ensuring the job is done correctly. Weighing the costs of parts and labor against your time and expertise is crucial when deciding between DIY and professional repair. This comparison helps homeowners make informed decisions to stay within budget.

8.3. Warranty and Service Options
Grohe offers comprehensive warranty and service options to ensure customer satisfaction. Most Grohe kitchen faucets come with a limited lifetime warranty, covering manufacturing defects and ensuring durability. For repairs, Grohe provides detailed manuals and spare parts finders to simplify the process. Additionally, their customer service team is available to address queries and provide assistance. Extended service plans and professional support are also options for homeowners seeking hassle-free maintenance. By leveraging these resources, users can maintain their faucets efficiently and extend their lifespan. Grohe’s commitment to quality and customer care makes their warranty and service options a valuable asset for faucet owners. This support ensures long-term functionality and peace of mind.

Safety Precautions
Always turn off water supply before starting repairs to avoid water damage or flooding. Use proper tools and protect surrounding areas from potential water leakage or spills. Ensure electrical safety by disconnecting power sources if necessary. Wear protective gloves and eyewear to prevent injury from sharp parts or debris. Follow all manufacturer guidelines to maintain safety and prevent accidents during the repair process. Regularly inspect hoses and connections for signs of wear to avoid sudden bursts or leaks. Keep the workspace clean and well-lit for better visibility and to minimize risks. Proper ventilation is also essential when using adhesives or chemicals during repairs. Never leave open flames or sparks near water or electrical components to prevent fire hazards. Always test the faucet at low pressure after repairs to ensure there are no hidden leaks or issues. If unsure about any step, consider consulting a professional to avoid potential dangers.
9.1. Proper Use of Tools
Using the correct tools is crucial for a successful Grohe kitchen faucet repair. Always use wrenches, pliers, and screwdrivers that fit the specific bolts and screws to avoid stripping or damaging them. Inspect tools for wear or damage before use, as faulty tools can lead to further issues. Apply gentle, controlled force to prevent scratching or breaking faucet components. Use adjustable wrenches for rounded or corroded nuts, and consider using a bucket to catch small parts during disassembly. Keep tools organized to avoid losing them. Refer to the Grohe manual for recommended tools and techniques. Proper tool usage ensures safety, prevents damage, and makes repairs more efficient. Always handle tools with care to maintain your faucet’s integrity and functionality.
9.2. Handling Water Supply Lines
When working on your Grohe kitchen faucet, always turn off the water supply before starting repairs to prevent water leaks and damage. Use a bucket to catch any residual water in the lines. Inspect the supply lines for cracks, corrosion, or damage, and replace them if necessary. After completing repairs, slowly turn the water supply back on and check for leaks around connections. Ensure all fittings are securely tightened but avoid over-tightening, which can damage the lines. Keep the area clean and dry to prevent water damage during the process. Proper handling of water supply lines ensures a safe and leak-free repair experience. Always refer to the Grohe manual for specific instructions on handling water supply lines.
9.3. Avoiding Water Damage
To prevent water damage during Grohe kitchen faucet repair, always turn off the water supply lines before starting work. Use a bucket or towels to catch any water that may spill from the faucet or pipes. Inspect the supply lines for cracks or damage and replace them if necessary to avoid leaks. After completing repairs, slowly turn the water supply back on and check all connections for leaks. Dry the area thoroughly with a clean towel to prevent water spots or mineral buildup. Ensure all parts are securely tightened but avoid over-tightening, which could damage the faucet or pipes. Regularly cleaning up spills and keeping the area dry helps maintain your kitchen’s integrity and prevents costly water damage repairs.
Proper maintenance and timely repairs ensure your Grohe faucet’s longevity. Refer to official manuals for guidance and seek professional help when needed. Regular cleaning, checking for leaks, and replacing worn parts are essential for optimal performance. By following these tips, you can enjoy a flawless kitchen faucet experience. For further assistance, visit Grohe’s official website or consult authorized service centers.
10.1. Best Practices for Longevity
To ensure your Grohe kitchen faucet lasts for years, adopt a routine maintenance schedule. Regularly clean the faucet head and aerator to remove mineral buildup and debris. Check for leaks promptly and address them to prevent water damage. Descale the faucet periodically, especially in hard water areas, to maintain flow and performance. Lubricate moving parts annually to keep them functioning smoothly. Avoid using abrasive cleaners or tools that could scratch the finish. Always follow the manufacturer’s guidelines for cleaning and maintenance. By implementing these practices, you can extend the lifespan of your Grohe faucet and enjoy consistent, trouble-free performance.
10.2. When to Call a Professional
While many repairs can be handled with DIY techniques, certain issues require professional expertise. If you encounter major leaks, structural damage, or complex problems like faulty temperature control, it’s best to call a licensed plumber. Additionally, if you’re unsure about diagnosing the issue or lack the necessary tools, a professional can provide accurate solutions. Grohe faucets may also require specialized knowledge due to their advanced design. If your faucet is under warranty, hiring a professional ensures compliance with warranty terms. Don’t hesitate to seek expert help for time-saving, efficient, and reliable repairs, especially for intricate or high-stakes fixes.
10.3. Resources for Further Assistance
If you need additional support beyond this guide, Grohe offers comprehensive resources to assist you. Their official website provides downloadable repair manuals, detailed troubleshooting guides, and a spare parts finder tool to help you identify and purchase necessary components. Additionally, Grohe’s customer support team is available to answer questions and provide expert advice. For visual learners, Grohe’s service videos and installation guides offer step-by-step instructions. You can also refer to authorized dealers or professional plumbers for specialized assistance. These resources ensure that you have access to everything needed to maintain and repair your Grohe kitchen faucet effectively, keeping it in optimal condition for years to come.